Quick Beginnings
The DB2 Connect workstation needs the following information
about each server connection that you want to use:
- Connection properties
- APPC remote LU properties
- CPI-C symbolic destination name properties
To configure settings for a new connection, do the
following:
- In the Servers and Connections window, select the server that you
want.
- Select Services->New Connection. The Insert
Connection window opens.
- In the Insert Connection window, select the type of connection you
want. Our example uses 802.2. See the online
help for information on the other available choices.
- Click on OK. The Connection Properties window
opens.
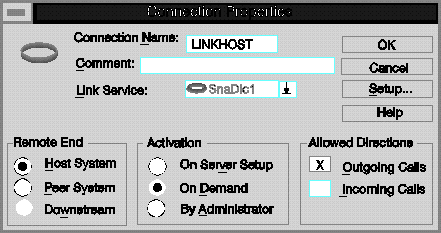
Use the following values:
- Connection Name
- LINKHOST (7)
- Link Service
- SnaDlc1
- Remote End
- Peer System radio button
- Activation
- On Demand radio button
- Allowed Directions
- Outgoing Calls check box.
- The following is an example of an OS/390, MVS, VM, or VSE
connection:

Use the following values:
For a connection to OS/390, MVS, VM, or VSE:
- Connection Name
- LINKHOST ((7))
- Link Service
- SnaDlc1
- Remote End
- Host system radio button
- Activation
- On Demand radio button
- Allowed Directions
- Outgoing Calls check box.
| Note: | The Link Service Name may be None unless the link was added from the MS SNA
setup icon.
|
For a connection to OS/400:
- Connection Name
- LINKHOST (7)
- Link Service
- SnaDlc1
- Remote End
- Peer System radio button
- Activation
- On Demand radio button
- Allowed Directions
- Outgoing Calls check box.
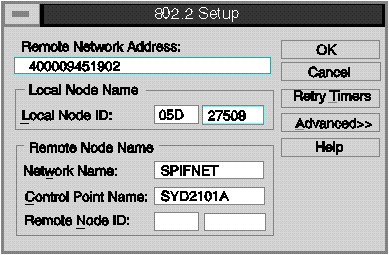
- Click on the Setup push button.
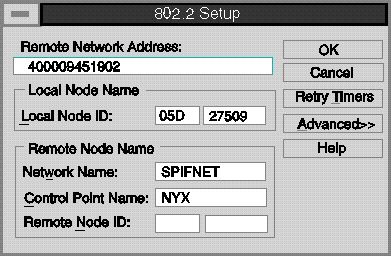
The 802.2 Setup window opens.
- Use the following values:
- Remote Network Address
- 400009451902 (8)
- Local Node ID
- 05D 27509 (13) plus (22)
- Network Name
- SPIFNET (1)
- Control Point Name
- NYX (4)
The window would appear as follows:
- Use the following values:
- Click on OK to save your work and return to the Connection
Properties window.
- Click on OK.
To assign a remote APPC LU to a connection do the
following:
- In the Servers and Connections window, select the connection that you
want.
- Select Services->Assign LUs.
The Insert LU window opens.
- In the Insert LU window, select APPC Remote.
- Click on OK. The New APPC Remote LU Properties window
opens.
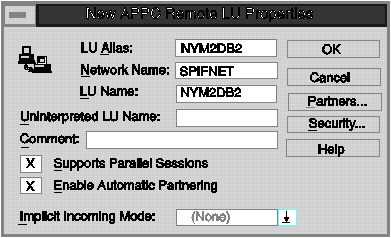
- Fill in the values for your system. For example.
- LU Alias
- NYM2DB2
- Network name
- SPIFNET (1)
- Remote LU name
- NYM2DB2 (2)
- Make sure the Supports Parallel Sessions and the Enable
Automatic Partnering check boxes are selected.
The window would appear as follows:
- Click on OK.
To configure the properties for CPI-C, do the
following:
- Select Options->CPI-C. The Configure CPI-C
Names window opens.
- Click on the Add push button. The CPI-C Symbolic
Destination Name Properties window opens.
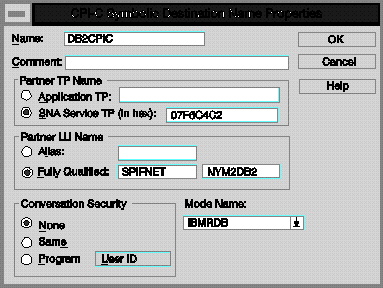
- Use the values that you recorded on your worksheet. For
example:
- Name
- DB2CPIC (16)
- SNA Service TP
- 07F6C4C2 (17)
- Fully Qualified
- SPIFNET.NYM2DB2(1.2)
- Mode Name
- IBMRDB (6)
- Conversation Security
- By default, None is selected. You will specify the
conversation security type later.
- Click on OK to save your work and return to the Connection
Properties window.
- Click on the Close push button to close the Configure CPI-C
Names window and return to the Servers and Connections window.
[ Top of Page | Previous Page | Next Page | Table of Contents | Index ]
[ DB2 List of Books |
Search the DB2 Books ]


